Table of Contents
If water damage is not properly managed, it can quickly escalate into a disaster in a matter of hours. The infamous culprits, ruptured pipes, flooded basements, leaky roofs, and malfunctioning appliances can all cause excessive water that brings along serious structural damage, mould growth, and health issues. Immediate intervention is called for, but what are the correct water damage restoration steps to take?
If you would rather have professionals handle the process, our water damage restoration service takes care of every step for you.
Our speciality here at Disaster Care Capital is in water damage restoration to make sure that the restoration of either your home or business can occur in a safe and efficient manner. This guide will take you through the five essential steps in water damage restoration so that you can understand the process and necessity of restoration by professionals.
Visit the official government guideline on flood damages by UK Government for more insights.
Water Damage Restoration Steps
1. Water Damage Inspection
Before restoration, a proper assessment is necessary, as it allows for the establishment of the water damage restoration process:
- The source of water damage (i.e. burst pipes, flood, leaking appliances, etc.).
- The water contamination category – White Water (clean water), Grey Water (contaminated but non-hazardous), or Black Water (highly toxic sewage or floodwater).
- Level of damage: from Class 1 being a mere nuisance to Class 4 being severe saturation of structural components.
Using moisture metres, infrared cameras, and analysis by experts, the professionals will find these hidden pockets of water and evolve the best strategy for restoration.
2. Remove Standing Water in Extraction
The removal of standing water must happen immediately to prevent further damages; as part of the Water Damage Restoration Steps, professionals remove excess water from floors, carpets, and basement areas using industrial vacuums, pumps, and wet/dry extractors.
Why should this step be done?
- Prevents water from soaking walls and floors any deeper.
- Reduces chances of electrical hazards.
- Prevents the occurrence of mould within the first 24-48 hours.
Even when obvious water has been removed, some moisture could be trapped within the walls and under the floorboards. That problem is why the next step becomes critical.
Read more on Flood cleanup tips.
3. Drying and Dehumidification of Affected Areas
Once standing water is extracted, the next step in water damage restoration steps consists of drying and dehumidification. The professionals utilised:
- High-powered air movers to ensure maximum drying time.
- Dehumidifiers to extract excess moisture from the air.
- Specialised heaters for large-scale drying of commercial properties.
Some flooring, drywall, or insulation may have to be pulled back in cases of heavy water damage to facilitate drying and limit any structurally damaging effects.
4. Clean and Sanitise All Surfaces
Water damage can permit bacteria, faeces, and toxic substances. Cleaning and disinfecting the affected area is necessary to:
- Stop the spread of mould and bacteria.
- Prevent smell from damp materials.
- Make the area safe for habitation.
Mould can start germinating as early as 24-48 hours after water entry into a structure; hence time is of the essence. The professionals promote a clean and safe environment by using HEPA vacuuming, antimicrobial treatments, and air scrubbing machines.
5. Repair and Rebuild If Necessary
Unfortunately, not all materials can be saved following water damage. If the structural components like drywall, flooring, or insulation are very compromised, replacements may be required.
- Carpets & Flooring – In some situations, proper deep cleaning may work, but more often carpets will need to be taken away.
- Walls & Ceilings – If water penetrates drywall or plaster, replacement of sections may be warranted.
- Wood Structures – If not treated, wood structures will twist, rot, and compromise the integrity of the building.
What is the final aim? Return the property to its original, if not better, state.
Contact Disaster Care Capital today for expert service!
Signs of Water Damage – When to Act
Ignoring water damages can yield far-reaching consequences. Do heed:
- Materials swollen or warped – Floors or walls are starting to swell.
- Paint peeling or bubbling – Water getting behind surfaces.
- Smelly or damp – An odour that can be associated with mould growth.
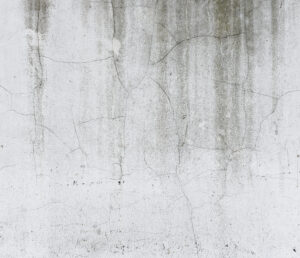
- Cracks on ceilings or walls – Structural weakening by water.
- Growth of mould or mildew – Health hazard, and it spreads at a fast pace.
If you notice any of the above-mentioned signs, you must act fast; delay will cost you more.
Why Water Damage Restoration Steps Must Be Done by Professionals
Some minor water issues can be resolved on their own; major water damage requires restoration from professionals.
Why Disaster Care Capital?
- 24/7 Emergency Response – Immediate response minimises damage.
- Certified Specialists – Our crew works with all categories of water damage.
- State-of-the-art Equipment – We employ industrial-grade tools for effective restoration.
- Mould Prevention – We not only dry the area; we prevent mould growth.
- Insurance Help – We help document damages for easy claims.
Read on average insurance payout for water damage
Water Damage Restoration Tips
-
Act quickly to limit damage
-
Stop the water source immediately
-
Remove standing water
-
Dry affected areas thoroughly
-
Disinfect surfaces to prevent mould
-
Contact a professional restoration service
Summary
Water damage restoration steps are paramount to fast and safe recovery of your home or business. Each step from site inspection to drying, cleaning, and repairs is crucial to curtailing long-term damages.
In summary:
- Identify the source of water damage.
- Extract standing water in order to prevent further damage.
- Completely dry and dehumidify the area.
- Sanitise the surfaces to rid them of bacteria and mould.
- Repair and restore the damaged material.
Need professional water damage restoration? Contact Disaster Care Capital today for expert service!
FAQs
Water Damage Restoration: How Long Does It Normally Take?
For the most part, the timeline for restoration ranges anywhere between a few days to maybe a few weeks, depending on the extent of the water damage and how long it takes to dry completely.
Can I Do My Own Water Damage Cleanup?
If you have an unimportant leak, you may mop up some water and perhaps use some household fans. But flooding, sewage leak, or very damp issues need professionals to fix it.
Would Water Damage Restoration Be Covered By Home Insurance?
This is determined by your insurance policy, as a whole. Most home insurance policies cover sudden and accidental water damage, while less likely gradual leaks and poor maintenance.
After Water Damage, How Soon Does Mould Grow?
Within 24 to 48 hours, Mould may start to proliferate if moisture has not been removed.
What Can I Do To Avoid Water Damage In The Future?
Regularly inspect pipes and appliances for leaks. Keep gutters and drains clear to avoid blockage. Use a dehumidifier to control humidity levels.
What are the steps of water damage restoration?
Emergency contact and inspection Water removal and extraction Drying and dehumidification Cleaning and sanitising Damage repair and restoration
How to restore water damaged?
To restore water-damaged areas: Stop the water source and ensure safety Remove standing water Dry and dehumidify the affected area Clean and disinfect surfaces Repair or replace damaged materials Monitor for mould and moisture issues
Most Popular