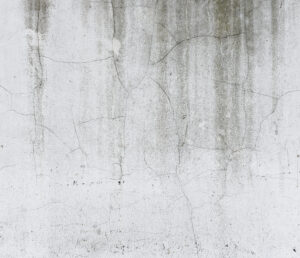
Finding black mould on your walls can be unsettling. Not only does it look unsightly, but it can also be harmful to your health. Whether you’ve noticed it in your bathroom, bedroom, or living room, getting rid of black mold is essential to keeping your home safe and clean.
In this guide, we’ll explore effective ways to remove black mould and ensure it doesn’t come back. Plus, we’ll cover the right way to paint over mould so your walls look fresh again.
What are Black Mould causes?
How to Get Rid of Black Mould?
Getting rid of black mould isn’t just about cleaning it up—it’s about addressing the root cause and preventing it from returning.
Here’s a step-by-step process to tackle mould on your walls and keep it from coming back:
- Identify the Source of Moisture
Mould nourishes in damp, humid environments. The first step in permanent black mould removal
is figuring out what’s causing the moisture. It could be anything from a leaky roof or pipe, condensation from windows, or poor ventilation. Fix the moisture issue before tackling the mould—otherwise, it’ll keep coming back.
Check out the 10 things you must know about mould
- Wear Protective Gear
Before you start cleaning, put on protective gear like gloves, a mask, and eye protection. Mould spores can be harmful to your health, especially when disturbed. It’s always a good idea to take precautions to avoid inhaling the spores or getting them on your skin.
What is the difference between Mould an Mildew?
- Clean the Mould Off the Walls
For removing black mould from walls–you’ll need to use a powerful cleaning solution.
Here are a few options:
- Vinegar: White vinegar is a natural–non-toxic way to kill mould. Pour vinegar into a spray bottle and spray it directly on the affected areas. Let it sit for an hour, then wipe it away with a clean cloth as it can be a black mould treatment.
- Bleach: If vinegar doesn’t do the job, you can use bleach. Mix one part bleach with three parts water in a spray bottle, apply it to the mouldy spots, and let it sit for 10-15 minutes. Scrub the surface with a brush to remove the mold. Remember to ventilate the room well while using bleach, and never mix it with other cleaning products.
- Mould-Killing Cleaner: There are various commercial black mould removers available. If you choose one, follow the instructions on the label for the best results.
- Scrub and Rinse
Use a soft brush or sponge to scrub the mouldy areas. Be gentle to avoid damaging the wall’s surface. After scrubbing, rinse the area with clean water and dry it thoroughly with a towel. Ensure the wall is completely dry to prevent mould from coming back.
- Prevent Future Growth
Now that the mould is gone– it’s important to prevent it from returning.
Here are some preventive measures:
- Improve Ventilation: Make sure your home is properly ventilated. Use exhaust fans in bathrooms and kitchens, and consider installing a dehumidifier if your home is prone to moisture buildup.
- Seal Leaks: Repair any leaks in pipes, roofs, or windows. Fixing leaks is crucial in stopping mould from growing in the first place.
Check our leak detection services - Control Humidity: Keep humidity levels in your home low, ideally between 30% and 50%. You can use a hygrometer to measure the humidity and a dehumidifier to control it.
Read more: What does mould smell like?
What are the health issues caused by black mould?
Black mould can release spores and mycotoxins into the air, which may cause various health problems when inhaled or touched. People with asthma, allergies, or weakened immune systems are especially vulnerable, those issues include:
-
Respiratory problems – coughing, wheezing, and shortness of breath.
-
Allergic reactions – sneezing, runny nose, itchy eyes, and skin rash.
-
Asthma flare-ups – worsening of asthma symptoms.
-
Sinus infections – nasal congestion or sinus pressure.
-
Headaches and fatigue – due to prolonged exposure.
-
Eye irritation – redness, itchiness, watery eyes.
-
Skin irritation – itching, redness, or dermatitis.
-
Toxic effects (rare) – nausea, dizziness, or immune system issues with long-term exposure.
How to Paint Over Mould?
Once you’ve successfully removed the mould–you may want to paint over the affected area to restore the appearance of your walls.
However, painting directly over mould can trap moisture underneath, leading to more mould growth. Here’s how to do it the right way:
- Clean Thoroughly
Before painting, ensure the mould is completely removed. Any remaining spores could cause the paint to peel or discolour. Clean the walls as described earlier to make sure they’re mould-free.
- Use a Mould-Resistant Primer
To prevent mould from growing back, apply a mould-resistant primer before painting. This primer seals the surface and creates a barrier that resists moisture and mould growth. Look for products specifically designed to stop mould and mildew in their tracks.
- Choose Mould-Resistant Paint
When selecting paint, opt for a mould-resistant variety. These paints contain antifungal agents that can help prevent future mould growth, especially in high-moisture areas like bathrooms and kitchens.
- Apply Paint Properly
Once your primer is dry, you can start painting. Apply the paint evenly and let it dry completely before adding a second coat if necessary. Make sure to follow the manufacturer’s instructions for drying times and application techniques.